
Quick Summary:
Custom neodymium magnets require you to specify shape, dimensions, grade, coating, magnetization direction, and tolerances. The manufacturing process runs from raw material melting to magnetization, with machining and coating in between. Choose the lowest grade that meets your needs, always add a protective coating, and never ignore temperature or magnetization direction. Work with a reputable supplier, send a clear drawing, and plan for 4-9 weeks lead time.
Struggling to find a magnet that fits your exact design? Off-the-shelf neodymium magnets rarely match custom shapes, specific pull strengths, or tight tolerances. And if you pick the wrong grade, coating, or magnetization direction, you’ll end up with corrosion, demagnetization, or wasted budget.
The solution? A custom magnet built around your specs. In this guide, as a professional custom neodymium magnets manufacturer, I’ll show you how to define your shape, dimensions, grade, coating, and magnetization direction. You’ll also learn the 10-step manufacturing process and the most common mistakes to avoid. By the end, you’ll know exactly how to order custom neodymium magnets in 2026.
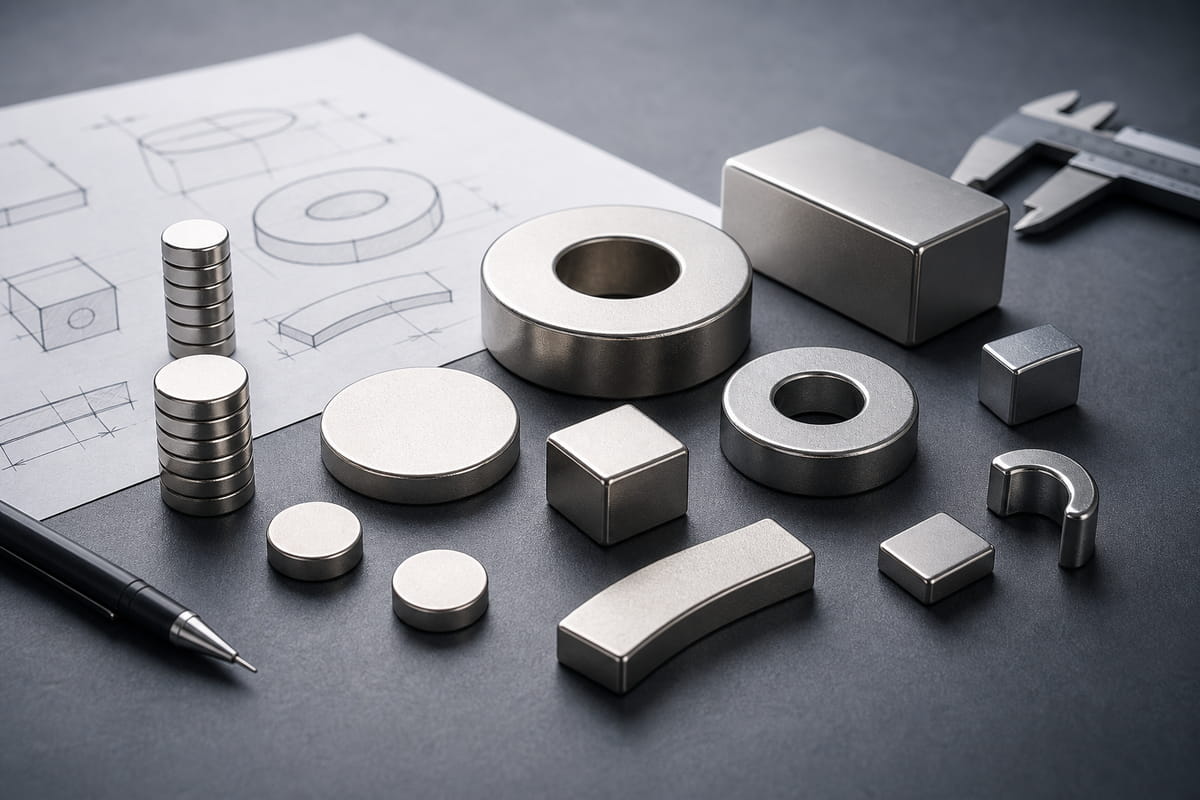
Why Bother With Custom Neodymium Magnets?
Maybe you need a magnet that fits into a curved housing. Maybe you need a magnetic assembly with a specific magnetization direction. Or maybe you need 5,000 identical magnets with tight tolerances.
In all those cases, off-the-shelf magnets won’t cut it.
Here’s the deal: custom doesn’t always mean complicated. It means your magnet is built to match your application, not the other way around. That’s a huge advantage when you’re designing something new.
How to Custom Neodymium Magnets
6 Specifications You Need to Get Right
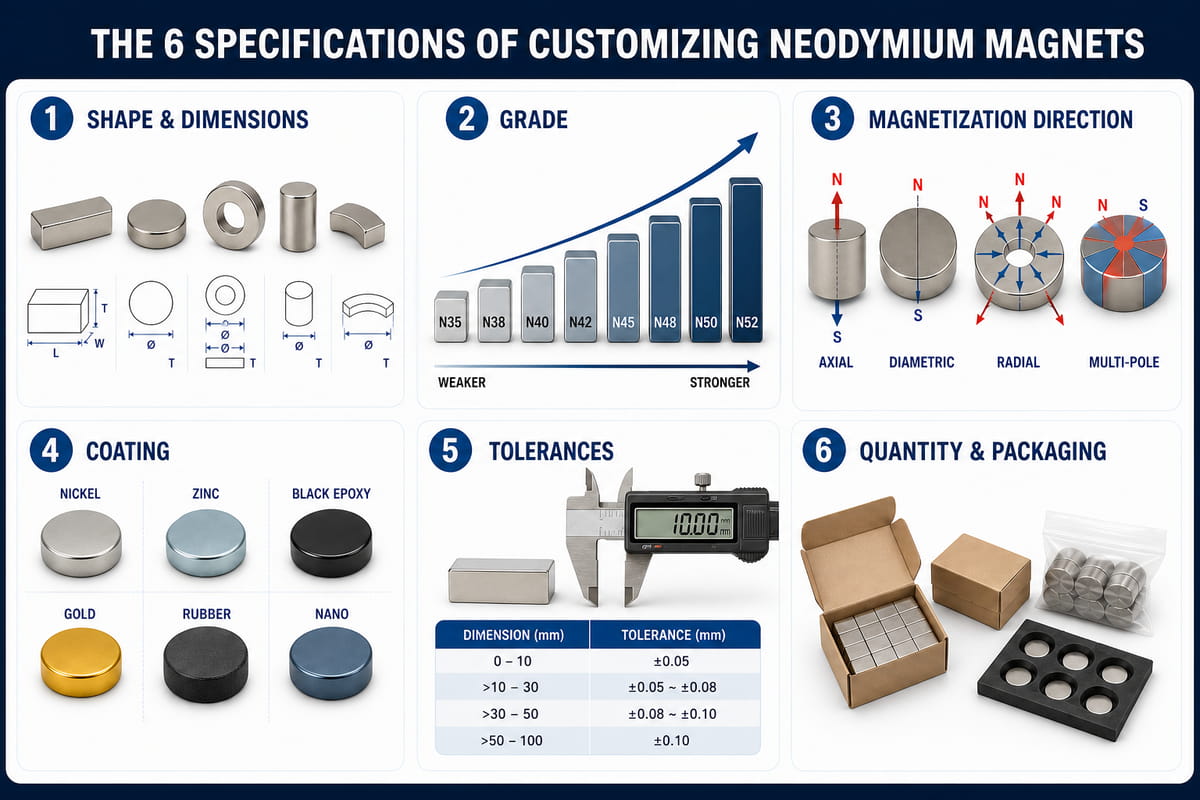
Before you contact any supplier, you need to nail down your specifications. This is where most projects go sideways. In my experience, the more detailed your specs, the smoother the process.
1. Shape and Dimensions
What shape do you need? Block, disc, ring, cylinder, arc? Start there.
Write down exact dimensions. Include units. Millimeters or inches both work, but be consistent.
If you have a drawing, send it. A simple 2D drawing with dimensions, tolerances, and notes is enough. If you don’t have a drawing, most manufacturers can work with you to create one.
Pro Tip: The shape should fit within a reasonable size envelope. Many suppliers can handle parts up to about 4″ x 4″ x 2″, with the magnetization direction in the 2-inch dimension.
2. Magnet Grade
Neodymium magnets come in grades from N35 up to N52. Higher grades are stronger. But stronger isn’t always better.
For everyday use, N35 and N42 are common. For maximum magnetic strength, N52 is popular. If your application involves heat, you need a high-temperature grade like N38H or N42SH.
Don’t over-specify. Higher grades cost more and can be harder to machine. Choose the lowest grade that safely meets your requirements.
Pro Tip: If your part runs hot, pay attention to intrinsic coercivity (Hcj). That’s the number that tells you how well the magnet resists demagnetization at elevated temperatures.
3. Magnetization Direction
This is a big one.
Neodymium magnets can be magnetized in different directions: axial, diametric, radial, or multi-pole.
- Axial means the poles are on the flat faces.
- Diametric means the poles are on the curved sides.
- Radial is common for motors.
- Multi-pole is used for encoders and precise rotation.
The magnetization direction is set during manufacturing, not after. If you don’t specify it, you might get a magnet that’s magnetized the wrong way. That’s an expensive mistake.
4. Coating and Plating
Bare neodymium rusts. In humid environments, it can corrode quickly.
That’s why custom magnets come with a protective coating. The most common option is nickel-copper-nickel. It’s tough, durable, and looks clean.
Other options include:
- Zinc for budget-friendly protection.
- Epoxy for excellent corrosion resistance.
- Gold for decorative or medical applications.
- Rubber coating for grip and impact protection.
- Nano coating for saltwater resistance.
Pro Tip: If your magnet will live outdoors or in a marine environment, skip the basic nickel and go with epoxy or nano coating.
5. Dimensional Tolerances
How precise does your magnet need to be?
Standard tolerances are usually around ±0.05 mm to ±0.1 mm. That’s fine for most projects. But if you need tighter tolerances, say so upfront.
Tighter tolerances mean more machining time. More machining time means higher cost. Be realistic about what your design actually needs.
6. Quantity and Packaging
Custom orders usually have minimums. Many manufacturers require a minimum purchase amount, often around $250 per shape. Some require 1,000 pieces for certain production methods.
Let your supplier know your target quantity. It affects everything: tooling, press setup, and unit price. Also, tell them how you want the magnets packed. Magnetic assemblies need proper separation and padding to avoid chipping.
How Custom Neodymium Magnets Are Made
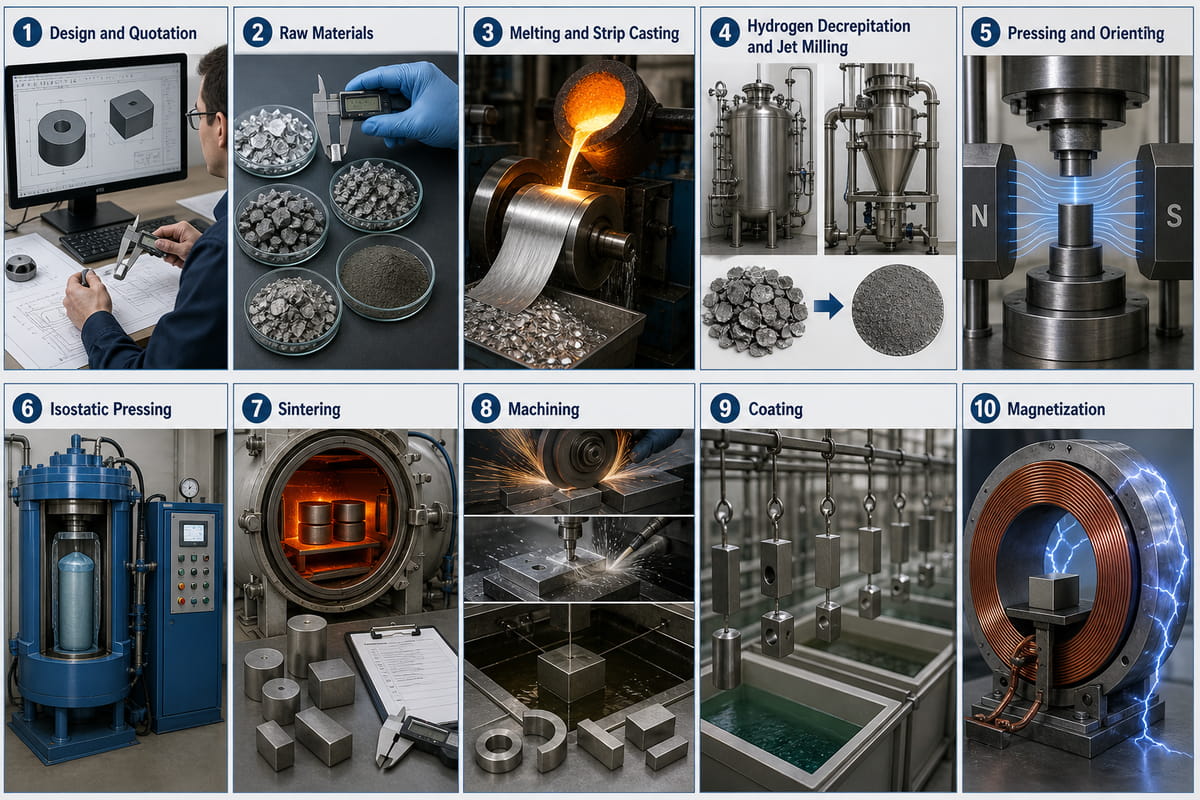
Once you submit your specs, here’s what happens inside the manufacturing facility.
Step 1: Design and Quotation
The manufacturer reviews your drawing. They check feasibility, material availability, and cost. You get a quote, usually within a few business days.
If your part is impossible to make, they’ll tell you. Trust that feedback. It’s better to adjust your design before production starts.
Step 2: Raw Materials
This is a little like baking bread. But instead of flour, salt, and yeast, you’re measuring neodymium, iron, boron, and sometimes dysprosium.
The exact recipe determines the final magnetic properties. Get the recipe wrong, and the whole batch fails.
Step 3: Melting and Strip Casting
The raw materials are melted into a liquid. Then that liquid is poured onto a cold rotating wheel. It cools rapidly into thin flakes.
Those flakes look strangely like breakfast cereal. But they’re the foundation of your custom magnet.
Step 4: Hydrogen Decrepitation and Jet Milling
This is where the technical stuff kicks in.
Hydrogen is used to break the flakes apart. Then the material goes into a jet mill, where it spins in a tornadic vortex until the particles are about 5 microns. That’s almost like flour.
Oxygen is the enemy here. The powder is kept away from air at all times.
Step 5: Pressing and Orienting
The powder is pressed into blocks or cylinders. During pressing, a magnetic field is applied. This sets the direction of orientation inside the material.
This is why magnetization direction matters so much. Once the block is pressed, the grain orientation is locked in.
Step 6: Isostatic Pressing
The blocks are vacuum-sealed and placed in an oil-based press. High pressure packs the material tighter. This improves magnetic properties and makes the block more uniform.
Step 7: Sintering
The pressed blocks are heated in a controlled vacuum oven. Time, temperature, and ramp cycle are exactly programmed.
Sintering turns the powder into a solid block. After that, samples are tested to confirm the material is correct.
Step 8: Machining
Now it’s time to cut the block down to your exact shape.
This is done with grinding, cutting, or wire EDM. Neodymium is brittle, so machining is slower and more careful than cutting steel. Sharp corners are a problem. If your design has thin walls or tiny features, it may not be feasible.
Step 9: Coating
After machining, the parts are cleaned and coated. Plating is applied to protect the surface. The coating choice depends on your environment and application.
Step 10: Magnetization
The last step is magnetization.
The finished magnet is placed inside a magnetizing coil. A huge pulse of electrical current runs through the coil. This aligns the magnetic domains inside the material.
One second it’s a piece of metal. The next second, it’s a real magnet.
Common Custom Shapes and Sizes
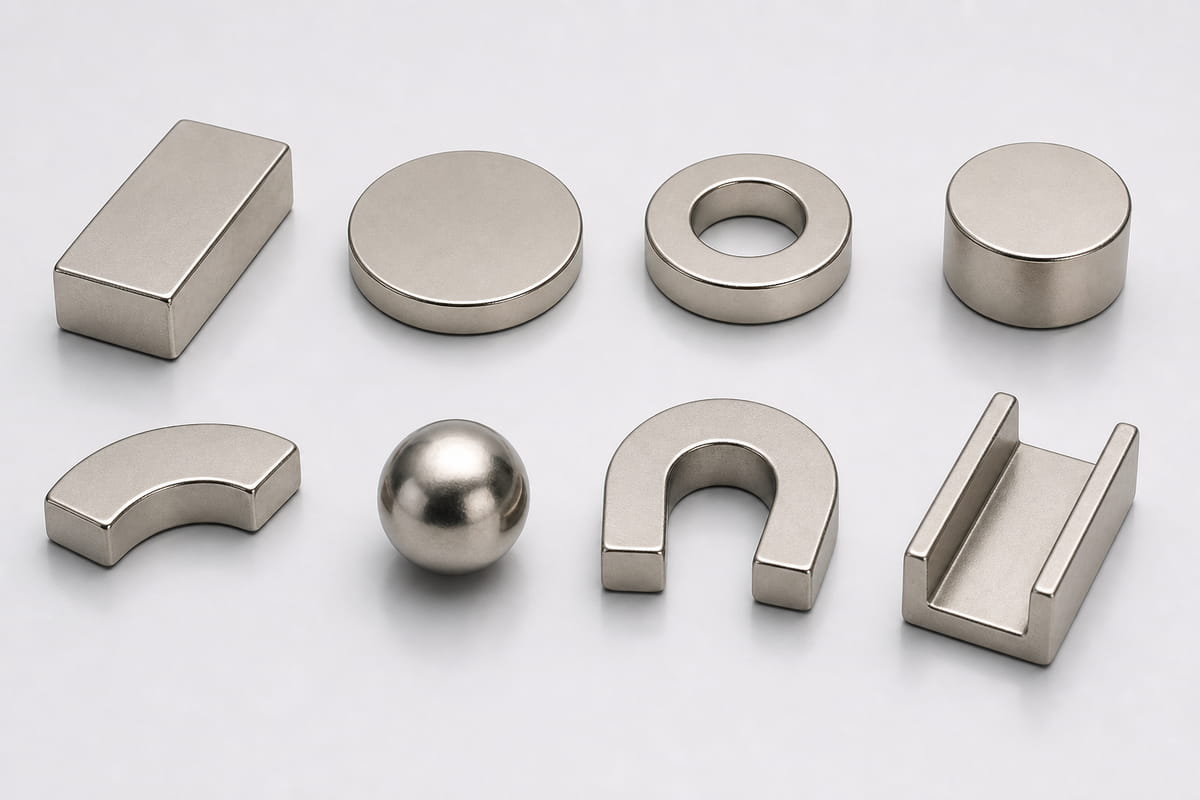
Custom neodymium magnets come in all sorts of shapes:
- Blocks
- Discs
- Rings
- Cylinders
- Arcs
- Spheres
- Horseshoes
- Channels
If you can draw it, there’s a good chance it can be manufactured. But keep in mind the material limitations.
Thin cross-sections are risky. Complex undercuts are tough. And sharp corners chip easily. If you’re not sure, ask the supplier before you finalize your design.
Coating Choices: What’s Best for Your Application?
Let’s talk coatings again, because this is where people get burned.
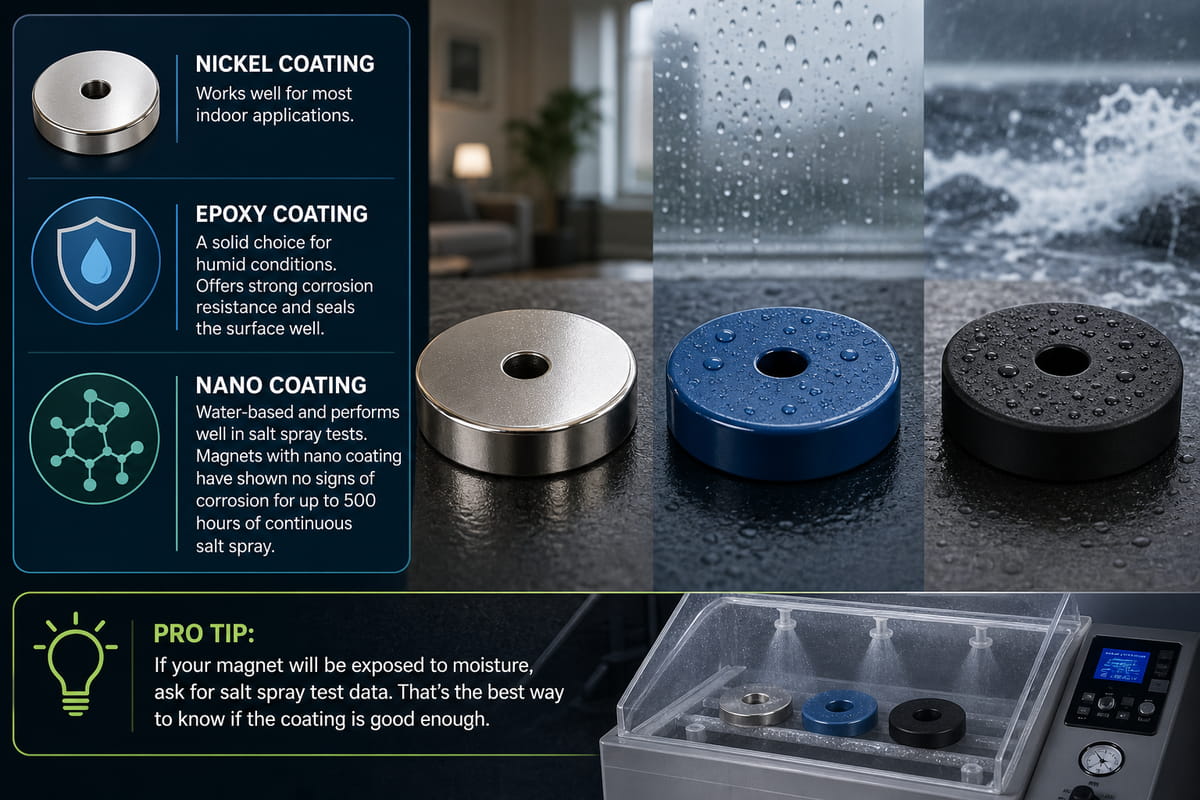
Neodymium magnets corrode fast without protection. The standard nickel coating works well for most indoor applications. But for outdoor or harsh environments, you need something better.
Epoxy is a solid choice for humid conditions. It offers strong corrosion resistance and seals the surface well.
Nano coating is another option. It’s water-based and performs well in salt spray tests. Magnets with nano coating have shown no signs of corrosion for up to 500 hours of continuous salt spray.
Pro Tip: If your magnet will be exposed to moisture, ask for salt spray test data. That’s the best way to know if the coating is good enough.
Magnetization Options You Should Know About
Magnetization direction isn’t just a technical detail. It’s a core design decision.
Let me explain.
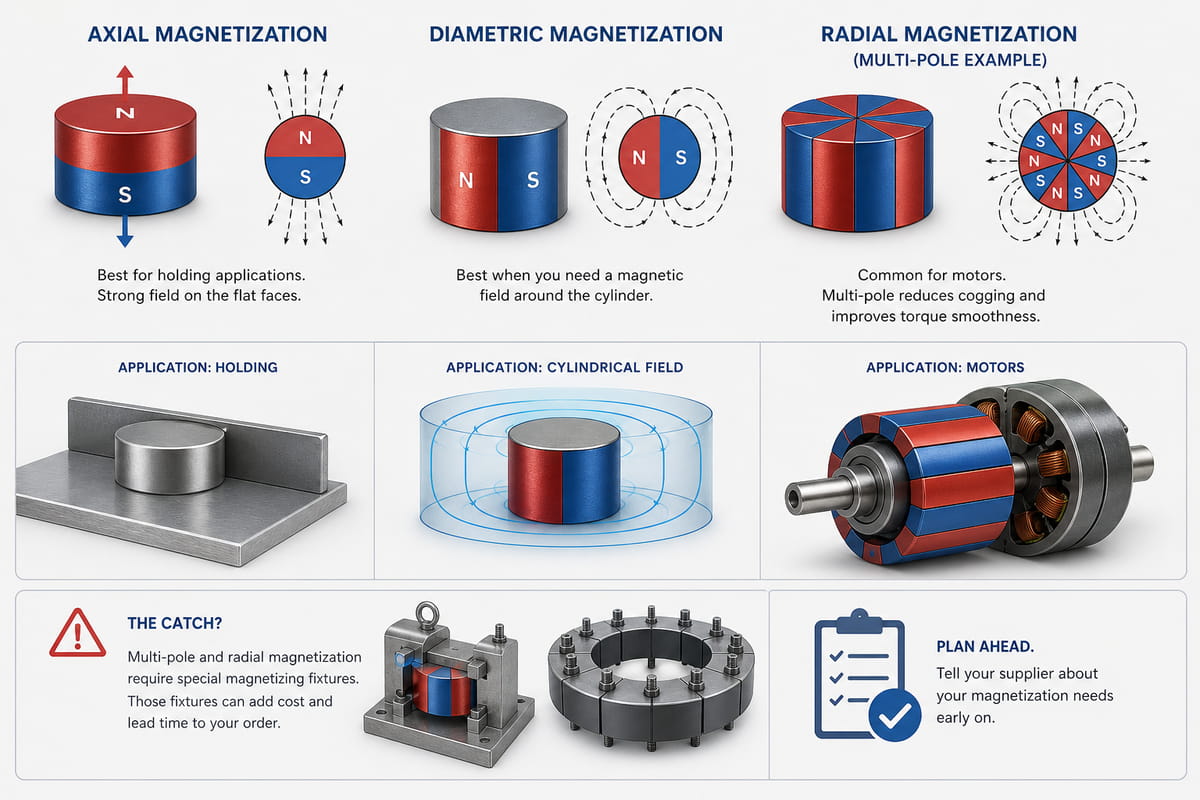
If you need a magnet for a holding application, axial magnetization is usually the easiest and most practical. If you need a magnetic field around a cylinder, diametric magnetization is better.
For motors, radial magnetization is common. Multi-pole magnetization helps reduce cogging and improves torque smoothness.
The catch? Multi-pole and radial magnetization require special magnetizing fixtures. Those fixtures can add cost and lead time to your order. Tell your supplier about your magnetization needs early on.
Quality Control and Testing
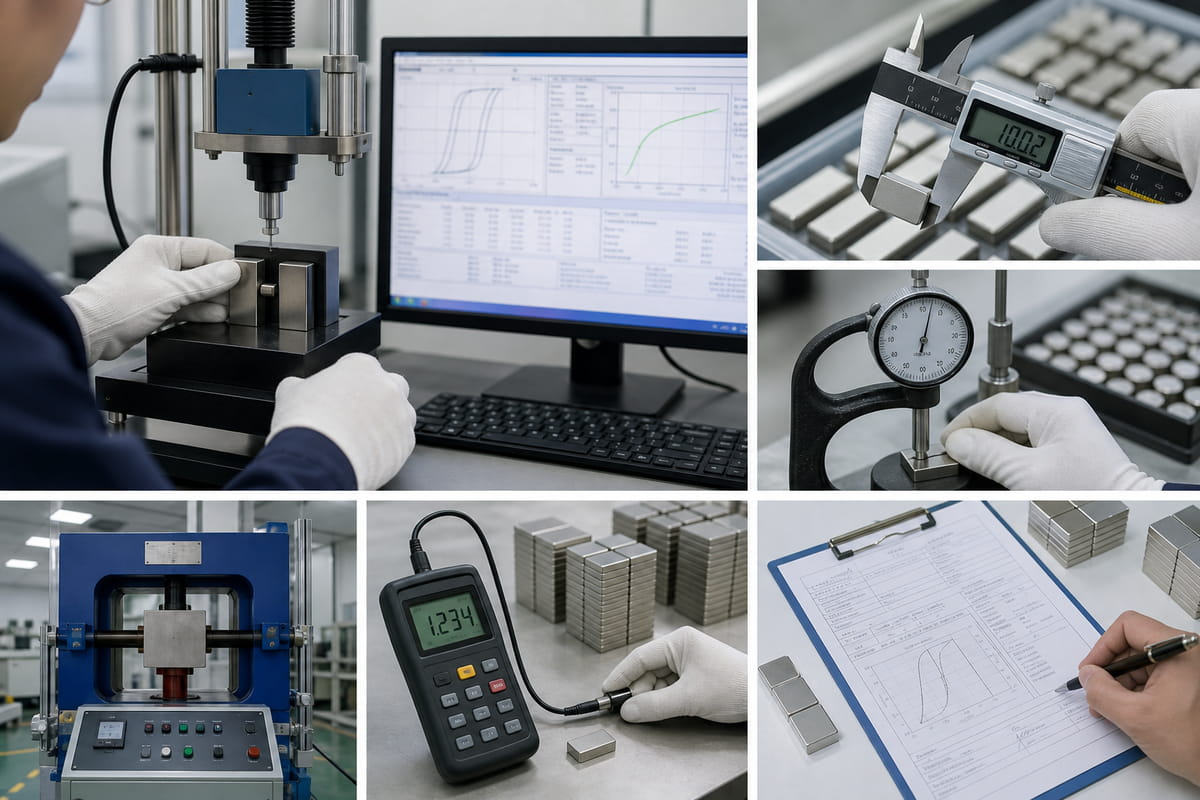
A good manufacturer doesn’t just make your magnets. They test them.
After sintering, sample pieces are checked for magnetic properties like remanence, coercivity, and maximum energy product. After finishing, dimensions are measured. After coating, thickness is verified. After magnetization, flux is tested.
You should ask for inspection reports. A good supplier will provide them.
In my experience, the best custom magnet projects are the ones where both sides agree on test methods before production starts. That way, there’s no confusion about what “passing” means.
Common Mistakes to Avoid
Let’s wrap up with a few mistakes I’ve seen way too often.
1. Choosing the Strongest Grade Every Time
N52 sounds impressive. But it’s not always the right choice. Stronger magnets are harder to handle, harder to coat, and more expensive. Use the lowest grade that actually works.
2. Ignoring Temperature
If your application runs hot, standard N-grade magnets will lose strength. At 150°C, you need an SH-grade. At 180°C, UH-grade. At 200°C, EH-grade. Don’t guess.
3. Skipping the Coating
Bare neodymium magnets are ticking corrosion bombs. Always specify a coating. Even a basic nickel coating is better than nothing.
4. Designing Sharp Corners
Magnets are brittle. Sharp corners chip. Add chamfers or rounded edges to your design whenever possible.
5. Not Sending a Drawing
A written description is okay. A drawing is better. If you can’t provide one, most suppliers can help you create a simple technical drawing.
6. Forgetting Handling and Packaging
Custom magnets are strong. Two large magnets can snap together and shatter. Make sure your packaging and assembly process accounts for that.
How Much Does It Cost in 2026?
Costs vary widely. But in 2026, you can expect a few common factors to drive the price:
- Magnet grade
- Shape complexity
- Coating type
- Tolerance requirements
- Order quantity
- Tooling or magnetizing fixtures
Most custom orders require a minimum purchase amount. Lead times typically run 4 to 9 weeks. Ordering a standard shape with a standard coating will always be faster and cheaper than something exotic.
Pro Tip: If you’re just prototyping, ask about existing tooling. Many manufacturers have standard molds and fixtures that can reduce your cost significantly.
Final Thoughts
Custom neodymium magnets aren’t magic. They’re a precise manufacturing process. If you nail down your specs, work with a reputable supplier, and plan for lead times, you’ll get exactly what you need.
Start with a clear drawing. Choose the right grade. Don’t forget the coating. And always specify your magnetization direction.
That’s how to custom neodymium magnets the right way.


